
It’s been some time since I last posted. and I did say that the horse pattern would be up soon… I sorely lack time management skills. ;A; but anyway here it is~! it was actually based on the photo of this horse here, which I eyeballed and came up with a pattern for. I hope you like it! 🙂
Abbreviations:
ch – chain
dec – (single crochet)decrease
inc – (single crochet)increase
sc – single crochet
sl st – slip stitch
Note: pattern is crocheted in joined rounds (unless stated otherwise), meaning the last st of each round is joined to the first stitch of the round with a sl st, and 1 ch is made before beginning the next round.
~HEAD~
Round 1: 6sc in magic ring [6]
Round 2: inc in all [12]
Round 3: *sc, inc* around [18]
Round 4: *2sc, inc* around [24]
Round 5: *3sc, inc* around [30]
Round 6: *4sc, inc* around [36]
Round 7-12: sc even [36]
Round 13: *4sc, dec* around [30]
Round 14: *3sc, dec* around [24] -note: stuffing can be added anywhere between rows 14-16
Round 15: *2sc, dec* around [18]
Round 16: *sc, dec* around [12]
Round 17: dec around [6]
Fasten off, leaving a long yarn tail for sewing. Eyes can be attached at the same time as the nose/muzzle for more accurate positioning.
~NOSE/MUZZLE~
Round 1: 6sc in magic ring [6]
Round 2: inc in all [12]
Round 3: *sc, inc* around [18]
Round 4-7: sc even [18]
Fasten off, leaving a long yarn tail for sewing. Using black yarn, embroider a smile on the muzzle, as well as 2 French knots for nostrils. Stuff the muzzle and sew to head between the eyes. Refer to photo if in doubt.
~EARS~ (MAKE 2)
For mine, I did the ears by picking up stitches on the head and continuing. I was just lazy to make them separately and sew them on afterwards, I guess… an alternative method (not tested) is provided later. Ears are crocheted in rows, not rounds.
Row 1: pick up 4 stitches on head, ch1 and turn [4]
Row 2: sc in each sc, ch1 and turn [4]
Row 3: sc, dec, sc, ch1 and turn [3]
Row 4: sc in each sc, ch1 and turn [3]
Row 5: sc, dec, ch1 and turn [2]
Row 6: ch1, sl st down the side of the ear. Fasten off and weave in ends.
Alternative method:
Row 1: ch5, sc in 2nd ch from hook, 1 sc in each chain [4]
Row 2: sc in each sc, ch1 and turn [4]
Row 3: sc, dec, sc, ch1 and turn [3]
Row 4: sc in each sc, ch1 and turn [3]
Row 5: sc, dec, ch1 and turn [2]
Row 6: ch1, sc down the side of ear
Fasten off, leaving a tail for sewing.
~BODY~
It’s just kind of like a sausage… oh well.
Round 1: 6sc in magic ring [6]
Round 2: inc in all [12]
Round 3: *sc, inc* around [18]
Round 4: *2sc, inc* around [24]
Round 5: *3sc, inc* around [30]
Round 6-15: sc even [30]
Round 16: *3sc, dec* around [24]
Round 17: *2sc, dec* around [18]
Round 18: *sc, dec* around [12]
Round 19: dec around [6]
Fasten off, weaving in the loose ends as best as you can. Sew head to one end of the body, preferably aligning the joins at the end of each round.
~LEGS~ (MAKE 4)
Using hoof colour,
Round 1: 6sc in magic ring [6]
Round 2: inc in all [12]
Round 3: *sc, inc* around [18]
Round 4: in back loops only, sc even [18]
Round 5: continuing in both loops, *4sc, dec* around [15]
Change to body/leg colour,
Round 6-7: sc even [15]
Round 8: *3sc, dec* around [12]
Round 9-11: sc even [12]
Crocheting in rows now, for the flap at the top of the leg,
Row 12: 7sc, ch1, turn [7]
Row 13: sc, dec, sc, dec, sc, ch1, turn [5]
Row 14: sc even, ch1, turn [5]
Row 15: dec, sc, dec, ch1, turn [3]
Row 16: sc even, ch1 [3]
Fasten off, leaving a long yarn tail for sewing. Stuff and sew the legs to the body, flaps upwards against the sides of the body.

Look at its wee pinned legs :3 Pardon the messy table though.
~MANE AND TAIL~
Cut pieces for yarn about twice the length of what you want each mane/tail hair to be. Latch hook the yarn onto the back of the horse’s head as well as its backside. A nice tutorial for attaching hair can be found here, which is the technique I used 🙂
For the frizzyness shown on the horse in my pictures, I used my hook to separate each of the individual plys in the yarn after latch hooking everything on. It now kind of resembles Albert Einstein.

Have fun making your own horse! 😀
NOTE: Any part of this pattern, and items made from this pattern, MAY NOT BE SOLD. Feel free to make some as gifts, or for yourself to keep, but PLEASE DO NOT use for profit of any kind.
Bonus: for taking so long to update, I have a couple of photos yay~

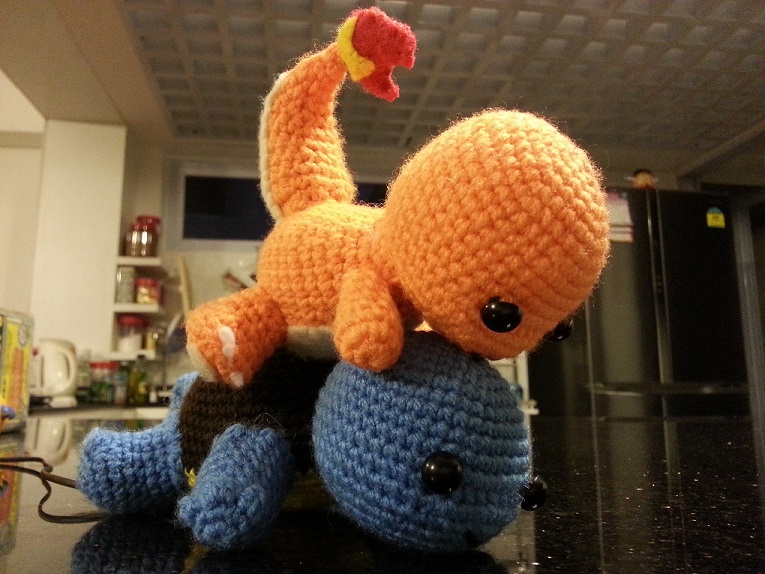
Yatta! Baby Charmander ❤

Charmander viewing the creation of Squirtle :3
Playtime!

Pingback: White horse (minus Prince Charming) | amiguruminutiae